


![A Look at 30 Key Cyber Crime Statistics [2023 Data Update]](https://www.thesslstore.com/blog/wp-content/uploads/2022/02/cyber-crime-statistics-feature2-75x94.jpg)


 (No Ratings Yet)
How to Install SSL Certificates In Microsoft Exchange 2010
SSL or Secure Sockets Layer certificates are used to secure the communications between a client and the server. SSL certificates use a particular method to protect the communication between the server and client of a Microsoft Exchange Server 2010 client access server.
The clients are sometimes mobile devices, computers inside and outside the network of the organization. This also includes clients with or without a virtual private network (VPN) connections.
All client communications are encrypted through SSL by default, once Exchange 2010 is installed, Microsoft Office Outlook Web App, Exchange ActiveSync, and Outlook can be used by you anywhere. Also by default, when Post Office Protocol version 3 (POP3)and Internet Message Access Protocol Version 4 (IMAP4)are installed it will not be configured to communicate over SSL.
Protocols such as HTTP, SMTP, POP and IMAP are secured by Exchange Server 2013 using certificates, which provide a high level of security to both client – server and server – server communications.
A Subject Alternative Name (SAN) certificate is a type of SSL certificate with multiple server and domain names on one single certificate. This means that you will need only one single certificate to secure one or multiple Exchange 2013 servers.
This certificate will also include all the server names and other external URLs that you plan to use in your Exchange environment. This is a much better option than using a single named SSL certificate for all the different names.
There are two methods available to install the SSL certificate on Microsoft Exchange 2010, one is called GUI Console and the other is called Command Line Interface. Please follow the below mentioned instructions to install your certificate.
Method 1 – Installing SSL certificate in Microsoft Exchange 2010 using GUI Console:
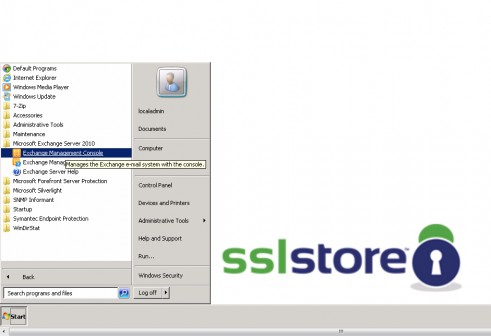
- From the start icon, continue to Programs where you will see Microsoft Exchange Server 2010 folder, in that select Exchange Management Console.
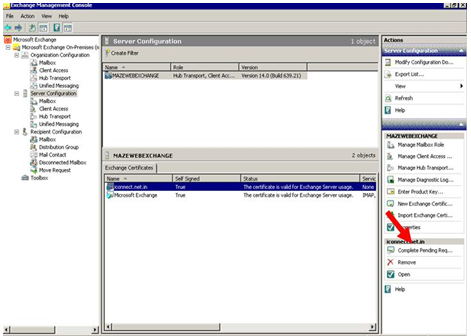
- Wait for the console to load up. Then you will need to expand Microsoft Exchange On-Premises and then click on Server Configuration available on the left pane.
- Then in the Exchange Certificates section, in the middle pane you will see the name that you must have entered while creating the CSR. Click that and highlight it, then you will have to click on Complete Pending Request at the right hand pane.
- After doing so a new window will appear which resembles a Wizard carrying a heading – Complete Pending Request. Here you will need to click on the Browse button and navigate to where the QuoVadis Certificate file is saved by you.
- Click the Complete button. Now a new screen will appear which will load the certificates and provide all the information on the Read file that you have selected.
- When you have finished reading, you will have to click on the Finish button.
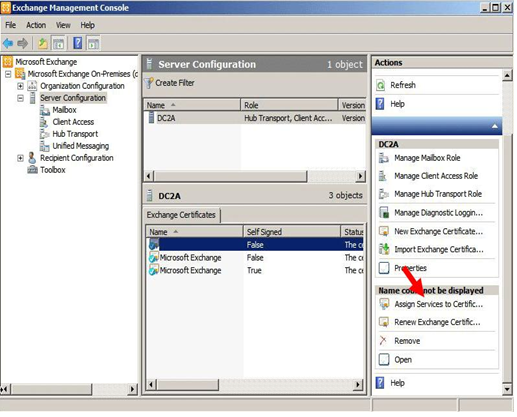
- Moving back to the Exchange Certificates section, you now click on the certificate you want to install from the list then on the right pane click the Assign Services to Certificate link.
- Now another window very similar looking to the previous wizard you saw earlier will appear. This window will be called the Assign Services to Certificate. In the Select Servers field you must click on the highlighted server of your choice to assign the certificate to and then click the Next button.
- Click on all the services that you want to secure using the certificate on the Select Services screen. Internet Information Services is selected by default. After you are done, click on the Next button.
- On the Assign Services screen, you now see a Configuration Summary of the certificate. When you are ready you must then click on the Assign button.
- The wizard called Assign Services to Certificates will now load the certificate and complete the process. The completion screen will display the installation of the certificate. Click the Finish button on the bottom of the wizard.
Now that your certificate is installed successfully, you can install intermediate and root certificate files as well.
Method 2 – Installing SSL certificate in Microsoft Exchange 2010 using Command Line Interface:
- First you must download and open the ZIP file which contains your certificate. It will be named as your_domain_name.cer.
- Now copy your_domain_name.cer file to your Exchange Server.
- You now need to start the Exchange Management Console, for that go to Start – Programs – Microsoft Exchange 2010 – Exchange Management Console.
- Here you will need to click on the link Manage Databases, and then you go to the Server Configuration.
- Now select your certificate from the menu displayed in the middle of the screen and then click on the link in the Action menu reading Complete Pending Request.
- Now you must enable your certificate, and for that you need to go back to the Exchange Management Console and click the link Assign Services to Certificate.
- Then select your server from the list given and then click the Next button.
- Select all the services for which you need the new certificate and then click the Next button, then the Assign button and finally the Finish button.
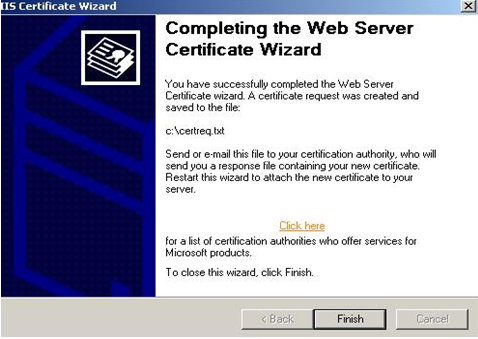
Now browse your certificate file, click open >>complete. If the Exchange 2010 shows an error message which reads
“The source data is corrupted or not properly Base 64 encoded.” then please ignore that error.
Press F5 to refresh the certificate and confirm that it now reads “False under Self Signed”. If it says “true”instead, that means you have selected the wrong certificate or have generated a request on a different server. You can fix this by creating a new CSR on the Exchange server and then reissuing the certificate.
After this process your certificate will be installed and ready to be used with Exchange.
5 Ways to Determine if a Website is Fake, Fraudulent, or a Scam – 2018
in Hashing Out Cyber SecurityHow to Fix ‘ERR_SSL_PROTOCOL_ERROR’ on Google Chrome
in Everything EncryptionRe-Hashed: How to Fix SSL Connection Errors on Android Phones
in Everything EncryptionCloud Security: 5 Serious Emerging Cloud Computing Threats to Avoid
in ssl certificatesThis is what happens when your SSL certificate expires
in Everything EncryptionRe-Hashed: Troubleshoot Firefox’s “Performing TLS Handshake” Message
in Hashing Out Cyber SecurityReport it Right: AMCA got hacked – Not Quest and LabCorp
in Hashing Out Cyber SecurityRe-Hashed: How to clear HSTS settings in Chrome and Firefox
in Everything EncryptionRe-Hashed: The Difference Between SHA-1, SHA-2 and SHA-256 Hash Algorithms
in Everything EncryptionThe Difference Between Root Certificates and Intermediate Certificates
in Everything EncryptionThe difference between Encryption, Hashing and Salting
in Everything EncryptionRe-Hashed: How To Disable Firefox Insecure Password Warnings
in Hashing Out Cyber SecurityCipher Suites: Ciphers, Algorithms and Negotiating Security Settings
in Everything EncryptionThe Ultimate Hacker Movies List for December 2020
in Hashing Out Cyber Security Monthly DigestAnatomy of a Scam: Work from home for Amazon
in Hashing Out Cyber SecurityThe Top 9 Cyber Security Threats That Will Ruin Your Day
in Hashing Out Cyber SecurityHow strong is 256-bit Encryption?
in Everything EncryptionRe-Hashed: How to Trust Manually Installed Root Certificates in iOS 10.3
in Everything EncryptionHow to View SSL Certificate Details in Chrome 56
in Industry LowdownPayPal Phishing Certificates Far More Prevalent Than Previously Thought
in Industry Lowdown