If you want to use a single certificate on more than one Exchange Server, you can do it by simply using the export/import feature. After the completion of requesting the certificate on the server, you get to import or export certificate in Microsoft Exchange 2013 EAC.
What You’ll Need
1. An SSL certificate installed on your Microsoft Exchange 2013 EAC
You’ll need to make sure that you’ve already installed an SSL/TLS Certificate on your primary server. If you haven’t already installed your certificate, you can follow our installation instructions.
How to Export SSL/TLS Certificate in Microsoft Exchange 2013 EAC
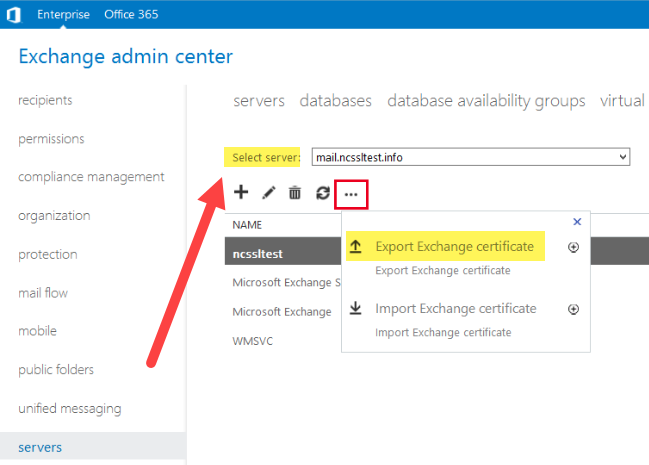
1. Select your server
Go to Servers > Certificates and select the server on which you have already installed the certificate.
2. Select “Export Exchange Certificate”
Click on the More icon “…” & select the option “Export Exchange Certificate”.
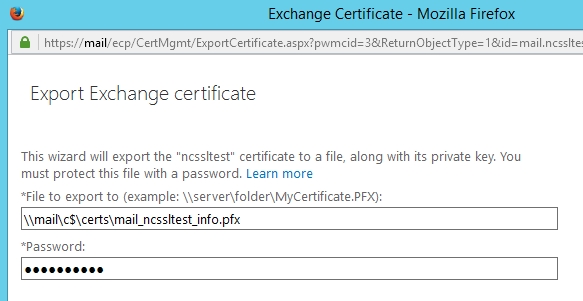
3. Choose a destination and a password
Enter the exact path & name of the folder you want to export the SSL/TLS Certificate to. You’ll be prompted to create a password for your certificate. Make sure to keep .PFX as the file extension.
Note: You shouldn’t forget or misplace the password you entered, as you will need it at the time of importing or converting the SSL/TLS Certificate into other formats. If you lose this password, you will not be able to recover it and your certificate will not be able to be used.
How to Import SSL/TLS Certificate in Microsoft Exchange 2013 EAC
1. Start the import by selecting “Import Exchange Certificate”
For importing the SSL/TLS Certificate, click the “…” (more) button and choose the “Import Exchange Certificate” option. It does not matter which server you select from the drop-down menu list as you’ll have to specify it later.
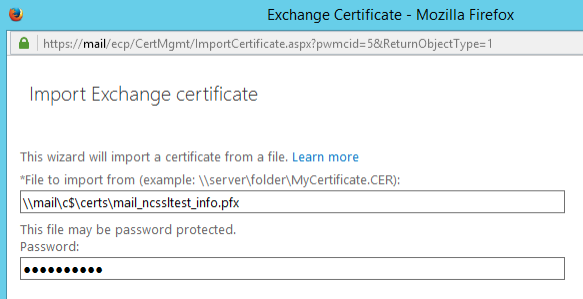
2. Locate your previously exported certificate (.PFX file)
Enter the path of the .PFX file at which you had saved it on your computer, enter the exact password which you used at time of exporting the SSL/TLS Certificate and click Next.
3. Choose your server
Click on the “+” button, select the server on which you want to install the SSL/TLS certificate on and finally, click on Finish.

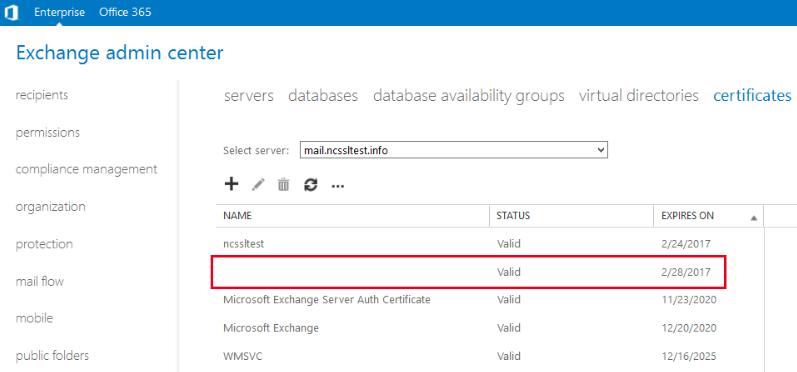
4. Locate your imported file
The imported file will be presented in the certificates menu (blank field in the name section). Now that you’re done with exporting and importing the certificate, you can go move on to Installing it on Microsoft Exchange 2013 EAC services.