How to Setup Comodo/Sectigo Code Signing eToken
After completing the enrollment and validation processes for your Code Signing certificate from Comodo or Sectigo, the Certificate Authority will issue your certificate following the certificate delivery method you chose when you first purchased it.
If you selected the Token + Shipping certificate delivery method, the CA will ship a pre-configured SafeNet eToken containing your code signing certificate to the verified address for your organization. Follow the instructions in this guide to setup your code signing token.
You will need:
- Your code signing eToken
- Token password (sent in shipping tracker email)
- SafeNet Authentication client (see first step below for downloads)
1Installing SafeNet Authentication Client
Download and open the appropriate installer for the machine that you wish to use during the signing process.
|
Windows Supported Windows OS: Windows Server 2022 (64-bit) Windows Server 2019 (64-bit) Windows Server 2016 (64-bit) Windows Server 2012 and 2012 R2 (64-bit) Windows 11 up to 22H2 Windows 10 (32-bit, 64-bit) up to 21H2 Windows 8.1 (32-bit, 64-bit) |
SafeNet Authentication Client 10.8 R8 (Windows)
OR SafeNet Authentication Client 10.8 R8 GA Minidriver (Windows) |
|
Linux Supported Linux OS: Red Hat 8 and 9 CentOS 8 and 9 Fedora 34, 36, and 37 Ubuntu 20.04 and 22.04 |
SafeNet Authentication Client 10.8 R1 GA (Linux) |
|
Mac Supported Mac OS: macOS 12.1 (Monterey) macOS 11.6.2 (Big Sur) macOS 10.15.7 (Catalina) |
SafeNet Authentication Client 10.8 R1 GA (MacOS) |

Follow the installation process and once complete, please perform a reboot to ensure that the SafeNet Authentication client has been successfully installed. After successfully installing the SafeNet Authentication Client software, follow the steps below to finish setting up your Code Signing certificate.
2Plugging in the USB
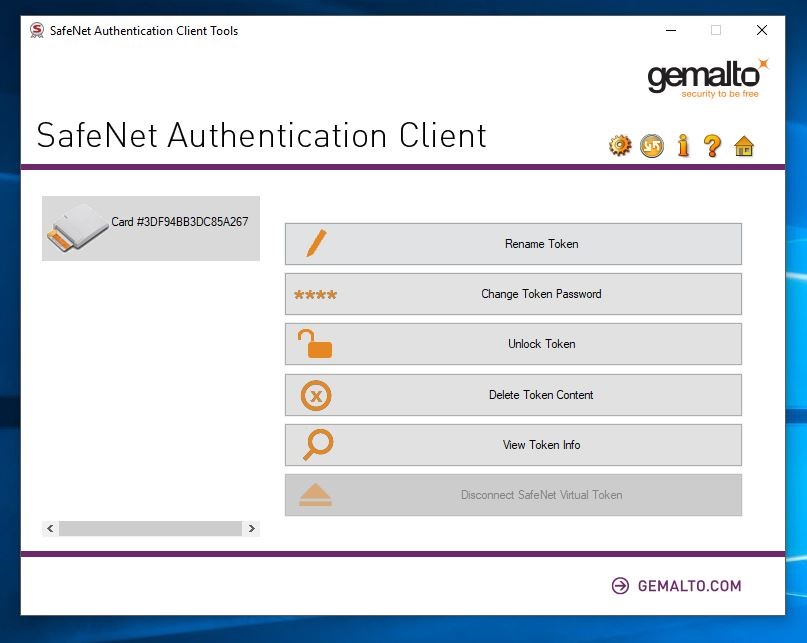
Before plugging in the USB key, open the newly installed SafeNet Authentication Client software. Once opened, you are ready to plug in the USB device.
At this point, your SafeNet Authentication Client should detect the USB key and populate your card into the application as seen above.
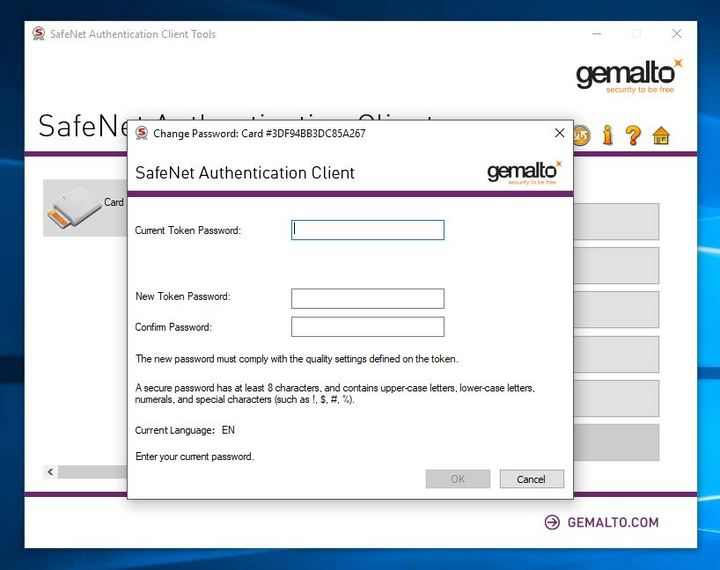
3Changing the Password
While it is not required, it is recommended that you choose to “Change Token Password,” which will open the interface to change the password for the token. Using the password received from the Certificate Authority, input the existing password and input a new unique password that meets the security requirements of SafeNet.
You should have received your code signing certificate token password in the same email that contained the tracking information for the hardware package.
4Viewing the Certificate
To view the certificate details, click the Gear icon in the top right of the SafeNet client.

Once clicked the interface will show a sidebar with the tokens currently plugged into your machine. Proceed to click on the drop-downs until you reach your company’s specific certificate as seen in the example below.
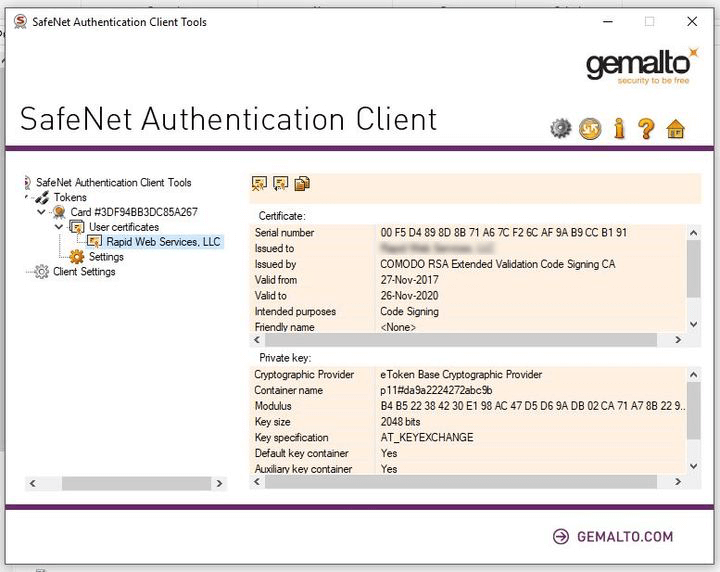
At this point, you’re ready to begin signing your application with your Code Signing certificate!