Introduction of AutoInstall SSL for cPanel
By far the most popular offering of our AutoInstall SSL Technology comes within the cPanel control panel. To complete this installation, you will first need to download “AutoInstall SSL cPanel” from within your partner account at The SSL Store™. Once you’ve downloaded the module, please proceed with unzipping the download so you have two folders titled “autoinstallssl” and “AutoInstallSSL2.0LaunchKit”.
Installing AutoInstall SSL for cPanel
Uploading AutoInstall SSL for cPanel
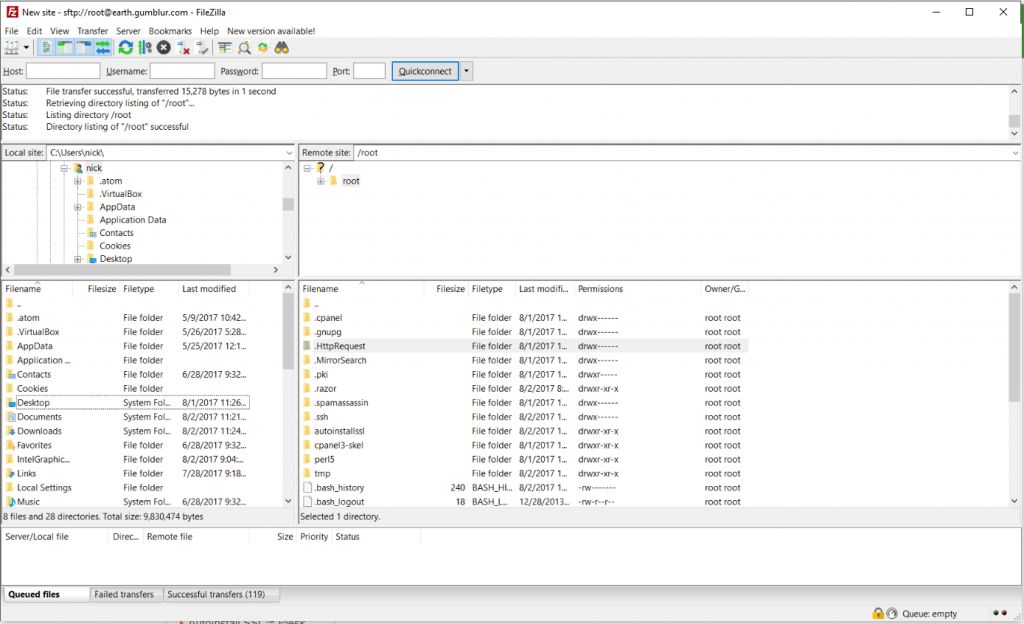
- Now that you’ve successfully extracted the download, you will want to connect via SFTP/FTP to your server under a privileged user such as root.
Note: Uncertain which FTP Client to use? The SSL Store recommends FileZilla due to the compatibility across all operating systems. - Once connected, drag the folder titled “autoinstallssl” so it appears within the user folder. In this instance below, we’re showcasing the folder under the “root” user.
Installing AutoInstall SSL for cPanel
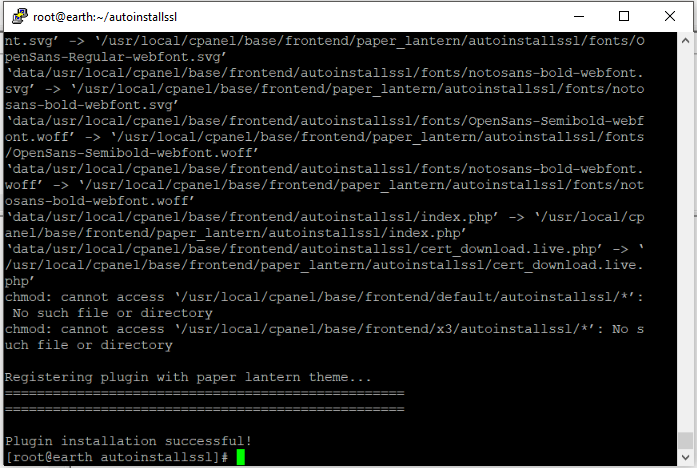
- Upon completion of the upload, open an SSH client and proceed to connect to the cPanel server using the same user credentials that you completed the file upload under
Note: Uncertain which SSH Client to use? The SSL Store recommends Putty due to the compatibility across all operating systems. - On a successful connection to the server you should be greeted with capability to input terminal commands via the command line interface.
- Within the command line interface input the following commands in the following order.
- cd autoinstallssl
- chmod 777 install
- ./install
- Within the command line interface input the following commands in the following order.
- After inputting the final command, your SSH client should begin populating with text that showcases the plugin being installed. Upon completion of the install you should see a notice informing you “Plugin Installation successful!”
Configuring AutoInstall SSL for cPanel
- At this point, AutoInstall SSL for cPanel will be running in the “Live” mode, but if you want to conduct some testing prior to launching it to your entire userbase, you will need to edit the argument from “LIVE” to “TEST” using the following command below.
- nano /usr/local/cpanel/base/frontend/paper_lantern/autoinstallssl/apisettings.xml
Note: paper_lantern is the current theme that ships by default with cPanel, if you’re using another theme you will need to amend this to the name of that theme.
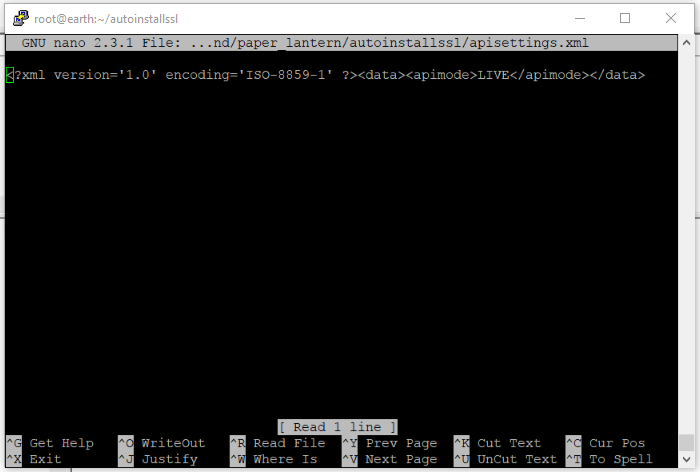
- nano /usr/local/cpanel/base/frontend/paper_lantern/autoinstallssl/apisettings.xml
- At this point, you can close SSH and go into the WHM interface for your cPanel server. The WHM interface can typically be accessed by going to the following URL https://domain.com:2087
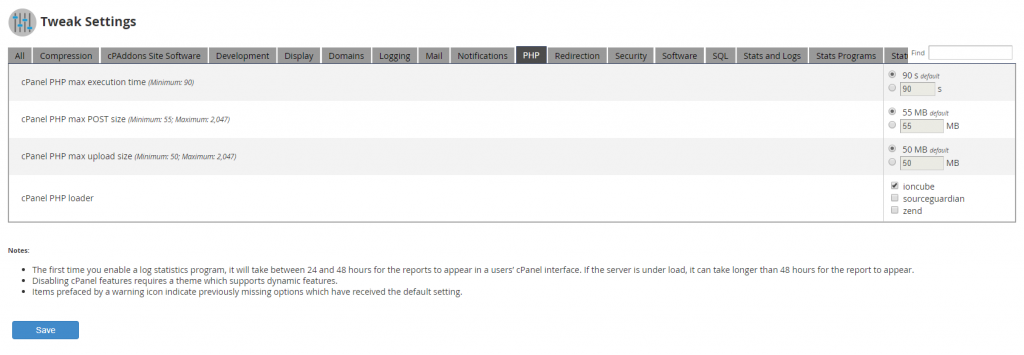
Note: You may encounter an error message “Your connection is not private” or something similar when attempting to visit your cPanel login page. This is caused due to your login page using a self-signed certificate by default. Please disregard this and proceed past the error message. - Once logged into the WHM panel, proceed to the “Tweak Settings” page.This page can be found under the “Server Configuration” icon on the homepage, or by typing “Tweak Settings” into the search menu on the left-hand sidebar.
- On this page click the “PHP” tab which will present you with four options. Click the “ioncube” option associated with “cPanel PHP Loader” and click “Save”
- At this point you’ve successfully installed AutoInstall SSL for cPanel and should see the AutoInstall SSL icon under the “Security” section of your cPanel accounts.
