The Process of Using AutoInstall SSL for cPanel
Now that you’ve successfully installed AutoInstall SSL for cPanel, you’re probably wondering how to proceed with using AutoInstall SSL. First and foremost, this article will primarily highlight the AutoInstall SSL pairing with our wonderful WHMCS Module that can be used to automate both the billing and deployment process for SSL Certificates. Secondly, this article assumes that you’re either an end-user or you personally have placed the order for an SSL Certificate and have accepted the pending order.
Getting an AutoInstall SSL Token
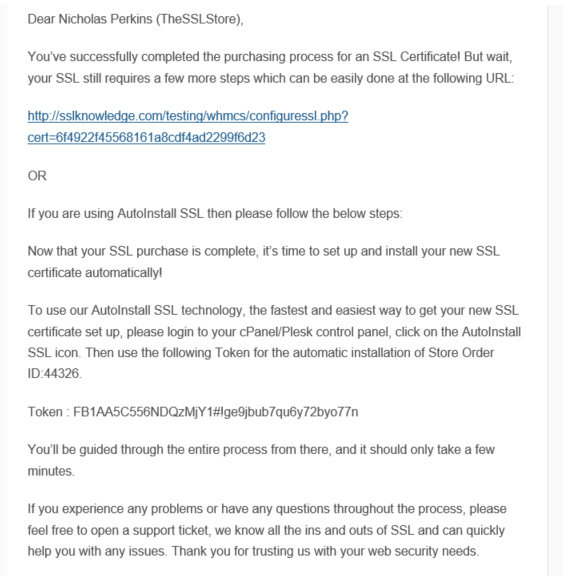
- Upon accepting the pending order in the backend of WHMCS, the end-user will receive an email that includes two vital bits of information to complete the enrollment of their certificate. The one bit that we’re going to focus on is the “Token” which will need to be copied.
AutoInstall SSL in cPanel
- Once copied the end-user will need to log in to cPanel, this can typically be accessed by going to https://theirdomain.com:2083 .
Note: You may encounter error message “Your connection is not private” or something similar when attempting to visit your cPanel login page. This is caused due to your login page using a self-signed certificate by default. Please disregard this and proceed past the error message. - As soon cPanel loads, the user will need to scroll down to the “Security” section of cPanel and click the “AutoInstall SSL” icon which will take them to the module.

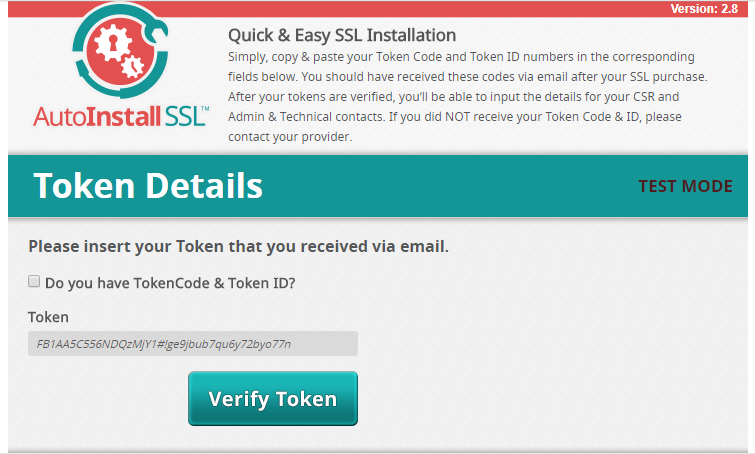
- On the AutoInstall SSL module page there will be a submission field where the end-user will need to paste their token code to proceed.
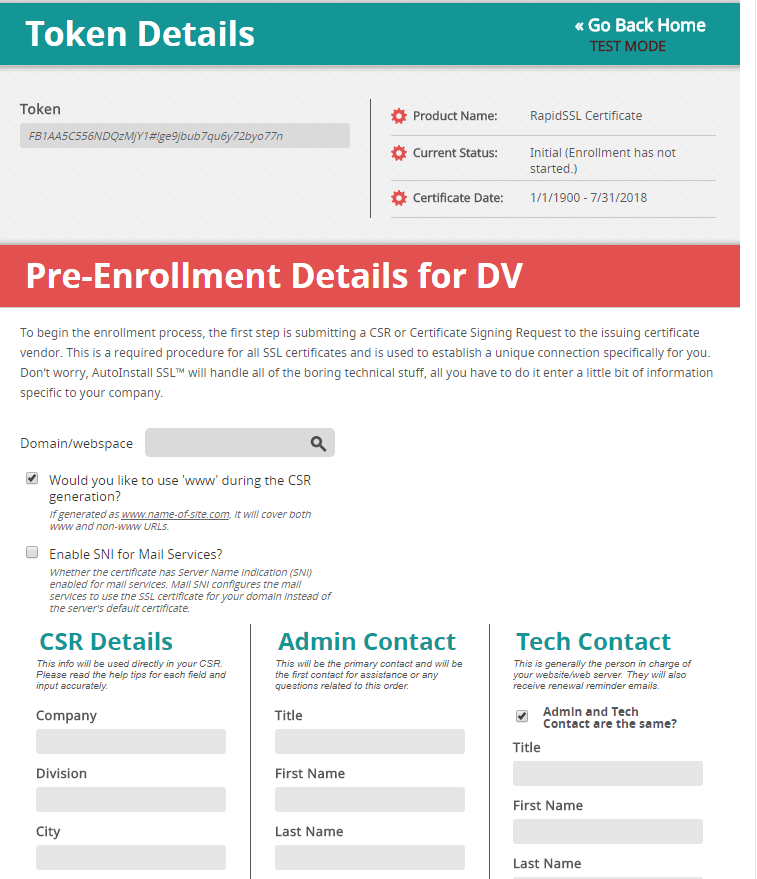
- Upon successfully pasting their token code the module will load an additional page that will require them to fill out some information about the certificate such as: the Domain, Admin Contact, and Technical Contact.
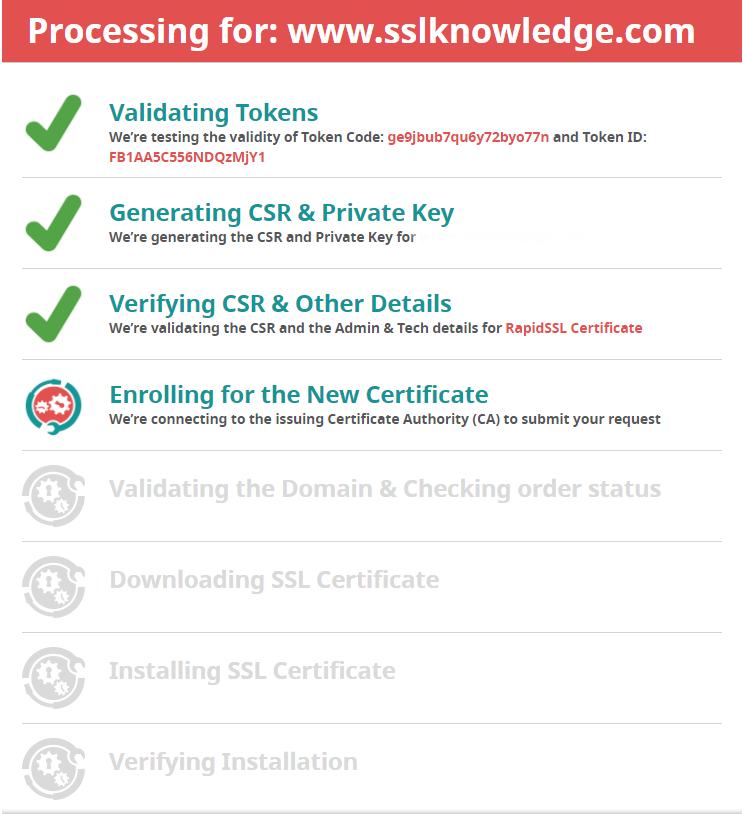
- Once filled out and submitted, the magic of AutoInstall SSL will begin. The user will be taken to a page containing an overview of the steps being completed by the module in real time.
Post AutoInstall SSL Management
- At the end of the process, AutoInstall SSL will inform the user that their SSL Certificate is now active and securing their website.
- In the instance, the user needs to re-issue, re-install, or download the SSL Certificate they can do this by submitting the token code once more in the AutoInstall SSL interface which will bring them to the overview page.
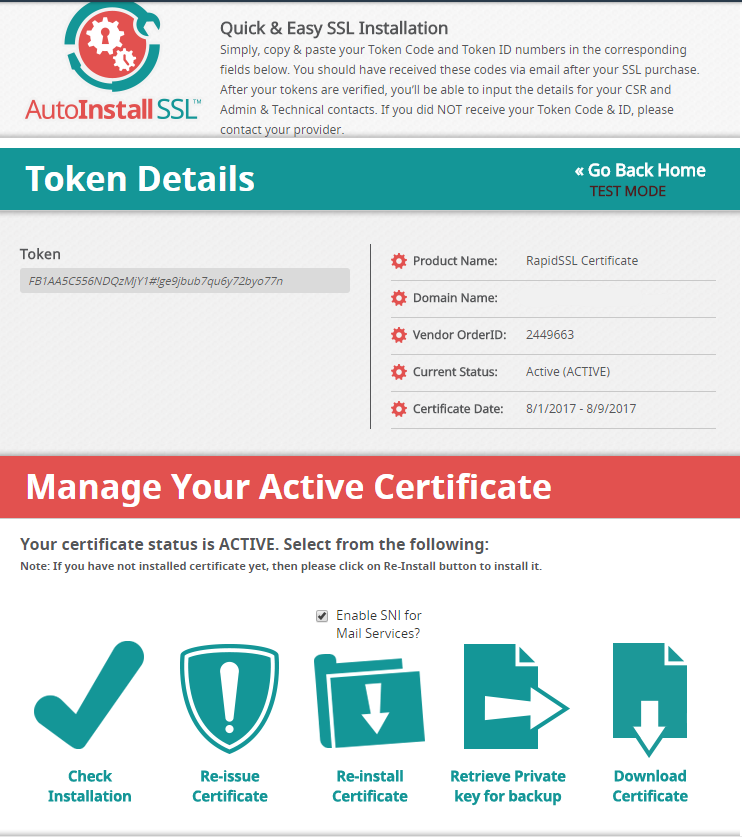
- In the instance, the user needs to re-issue, re-install, or download the SSL Certificate they can do this by submitting the token code once more in the AutoInstall SSL interface which will bring them to the overview page.