The SSL Store™ is always hard at work improving the wonderful technology of AutoInstall SSL on all of our platforms. Between bug fixes and features improvements, it’s crucial to stay up to date to ensure that the level of automation provided by AutoInstall SSL is at peak performance.
Note: There’s actually a nifty feature built into AutoInstall SSL for cPanel that allows for you to automatically stay up to date for most releases.
1. Download the latest AutoInstall SSL Module
To begin the update process, you will need to download the module from within your control panel. Once downloaded, please proceed with unzipping the download so that you have two folders titled “autoinstallssl” and “AutoInstallSSL2.0LaunchKit”. Extract the contents of each folder.
2. Connect to cPanel using SSH
Upon completion of the extraction, open an SSH client and proceed to connect to the cPanel server under a privileged user such as root.
Note: Uncertain which SSH Client to use? The SSL Store recommends Putty due to the compatibility across all operating systems.
Uninstall the older version of AutoInstall SSL
On a successful connection to the server you should be greeted with the capability to input terminal commands via the command line interface.
1. Input the below commands
Using the command line interface, input the below commands in the following order.
cd autoinstallssl
chmod 777 uninstall
./uninstall
After inputting the final command, your SSH client should begin populating with text that showcases the plugin actions being taken to uninstall the module. Upon completion of the uninstall you should see a notice informing you “Plugin Uninstall successful!”
Upload the Latest Version of AutoInstall SSL
1. Connect to your server using SFTP/FTP
At this point you will need to minimize the SSH client and proceed to connect via SFTP/FTP to your server under a privileged user such as root.
Note: Uncertain which FTP Client to use? The SSL Store recommends FileZilla due to the compatibility across all operating systems.
2. Drag the Autoinstall folder into the user folder
Once connected, drag the “autoinstallssl” folder you extracted so it appears within the user folder. In this instance below, we’re showcasing the folder under the “root” user.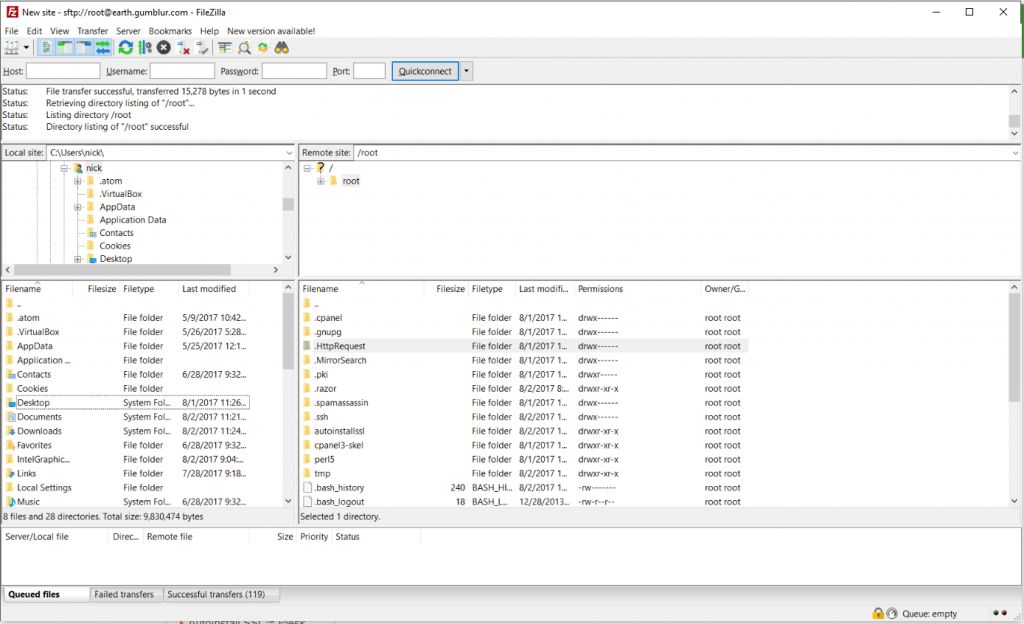
Note: If your FTP clients asks for permission to overwrite the original files, click continue so that the client can overwrite the older files with the newer ones.
Install the Latest Version of AutoInstall SSL
1. Reopen the SSH client
Upon completion of the upload, reopen the SSH client and proceed to connect to the cPanel server using the same user credentials that you completed the file upload under.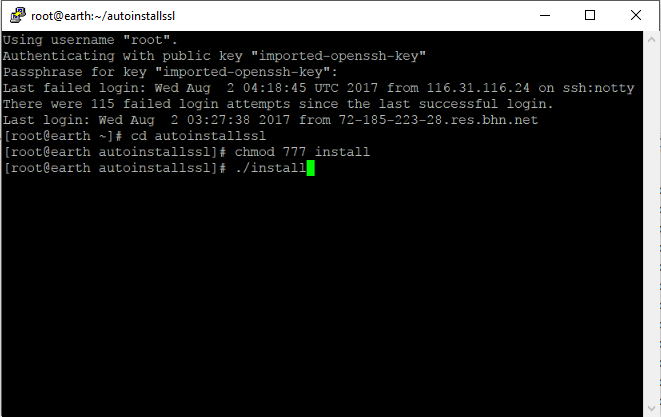
On a successful connection to the server you should be greeted with capability to input terminal commands via the command line interface.
2. Input the below commands
Within the command line interface input the following commands in the following order.
cd autoinstallssl
chmod 777 install
./install
After inputting the final command, your SSH client should begin populating with text that showcases the plugin being installed. Upon completion of the install you should see a notice informing you “Plugin Installation successful!” as pictured below.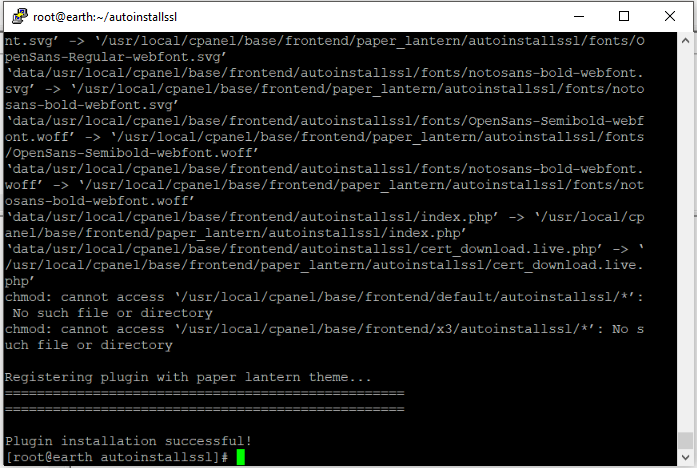
Configure the Environment of AutoInstall SSL
At this point, AutoInstall SSL for cPanel will be running in the “Live” mode, but if you want to conduct some testing prior to relaunching it to your entire user base, you will need to edit the argument from “LIVE” to “TEST” using the following command below.
nano /usr/local/cpanel/base/frontend/paper_lantern/autoinstallssl/apisettings.xml
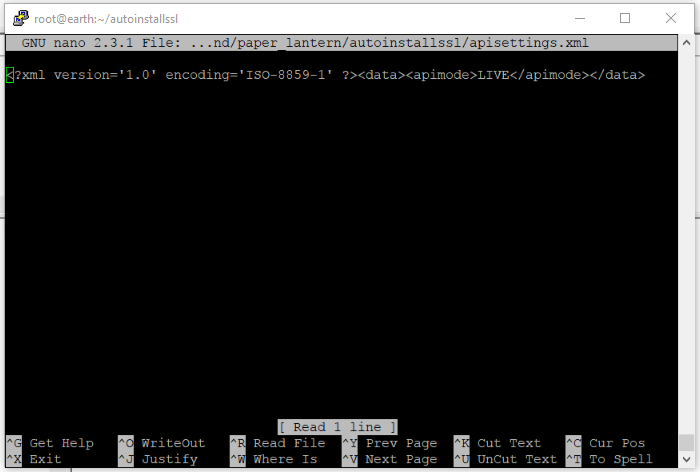
Note: paper_lantern is the current theme that ships by default with cPanel, if you’re using another theme you will need to amend this to the name of that theme
At this point, you should be fully up to date with AutoInstall SSL. As mentioned previously there is a nifty feature built into AutoInstall SSL for cPanel that allows for you to automatically stay up to date for most releases.