The following instructions will guide you through the CSR generation process on Juniper NetScreen. To learn more about CSRs and the importance of your private key, reference our Overview of Certificate Signing Request article.
1. Open the Application
Open Jupiter NetScreen’s WebUI application.
2. Access Configuration>Date/Time
Go to Options > Configuration and select Date/Time.

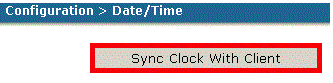
3. Sync Clock
Click on the Sync Clock with Client
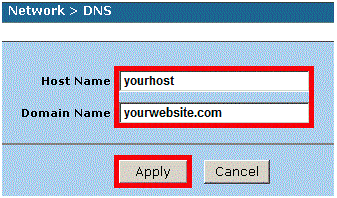
4. Enter the Host Name and FQDN
Enter the internal device host name in the Host Name field. Enter your fully qualified domain name (FQDN) in the domain field and click Apply.
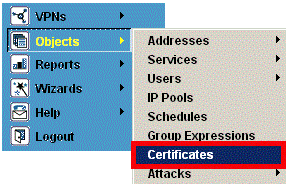
5. Navigate to Options>Certificates
Now go to the Options menu, go to Objects and click on Certificates.
6. Select New and Fill Out the Information
From here on, the actual CSR generation process starts. Fill out correct information in the respective fields and enter your fully qualified domain name in the FQDN (fully qualified domain name).
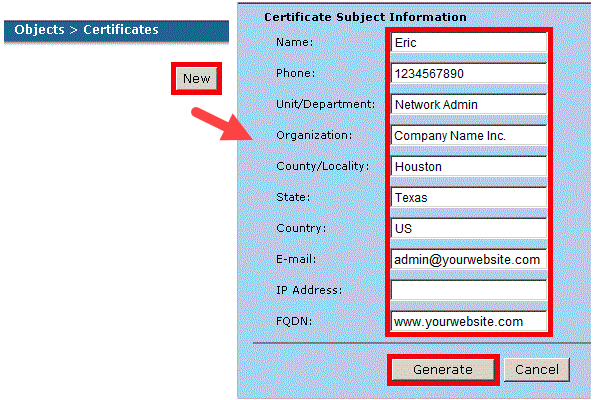
Once you’re done filling all the information, verify that all details are correct and select generate.
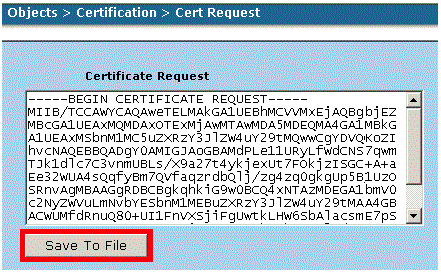
7. Save your CSR
Now your CSR should get generated. Save the CSR as a text file.
Upon generating your order with this CSR, your order will enter the validation process with the issuing Certificate Authority (CA) and require the certificate requester to complete some form of validation depending on the certificate purchased. For information regarding the different levels of the validation process and how to satisfy the industry requirements, reference our validation articles.
After you complete the validation process and receive the trusted SSL Certificate from the issuing Certificate Authority (CA), proceed with the next step using our SSL Installation Instructions for Juniper Netscreen. If you have any questions, or need help with any part of the process, you can reach out to our support team 24/7/365.