
We assume that you already know what BIMI (brand indicators for message identification) is and want to learn more about the technical of how to create a BIMI record for your domain name system.
Knowing this, we’ll cover the detailed steps you must complete in order to set up a BIMI record. Click this link to jump straight to the 3 steps.
Otherwise, there are a few quick last-minute housekeeping items you’ll need to do before you can create BIMI record for your domain.
4 Quick Items to Complete Before You Create a BIMI Record
Before you can set up your BIMI record, you must have your ducks in a row. This means that you must complete the following four steps ahead of time:
- Setting up SPF and/or DKIM records
- Setting DMARC to enforcement
- Configuring your BIMI logo SVG file and saving the secure link to where it’s stored
- Purchasing a BIMI Mark Certificate and saving the file’s secure HTTPS link
These steps are covered in greater detail in the following related resource. Click to read more or scroll to go straight to the directions for how to set up your BIMI record.
Related resource: How to Set Up and Implement BIMI for Your Domain
Save Up to 10% On Your New CMC or VMC
Use one of the following promo codes to get a 10% discount on your new Common Mark Certificate or Verified Mark Certificate (or simply click one of the links below to add it to your cart automatically):
| Common Mark Certificate Promo Codes | Verified Mark Certificate Promo Codes |
| 1-year certificate: CMC1save10 | 1-year certificate: VMC1save10 |
| 2-Year certificate: CMC2save10 | 2-Year certificate: VMC2save10 |
| 3-year certificate: CMC3save10 | 3-year certificate: VMC3save10 |
How to Create a BIMI Record — Step #1: Create a DNS TXT Record
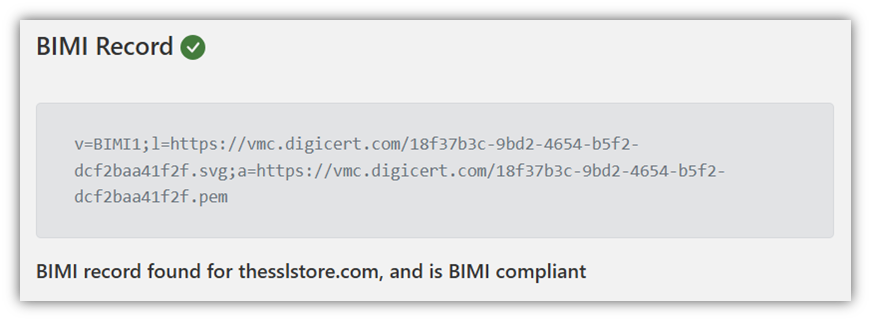
A BIMI record is a simple string of a few specific values that you add to your domain that looks akin to this:
To set up a BIMI record, open a text editor program (e.g., Notepad+) and create a new file. You’ll want to specify
- The BIMI version (i.e., v=BIMI1)
- The secure file location of your BIMI SVG logo file (i.e., l=https://the/path/to/your/file/logo.svg)
- The secure file location of your Mark Certificate file (i.e., a=https://the/path/to/your/certfile/logo_vmc.pem)
To simplify the process, you can use the BIMI Group’s free BIMI Generator tool:
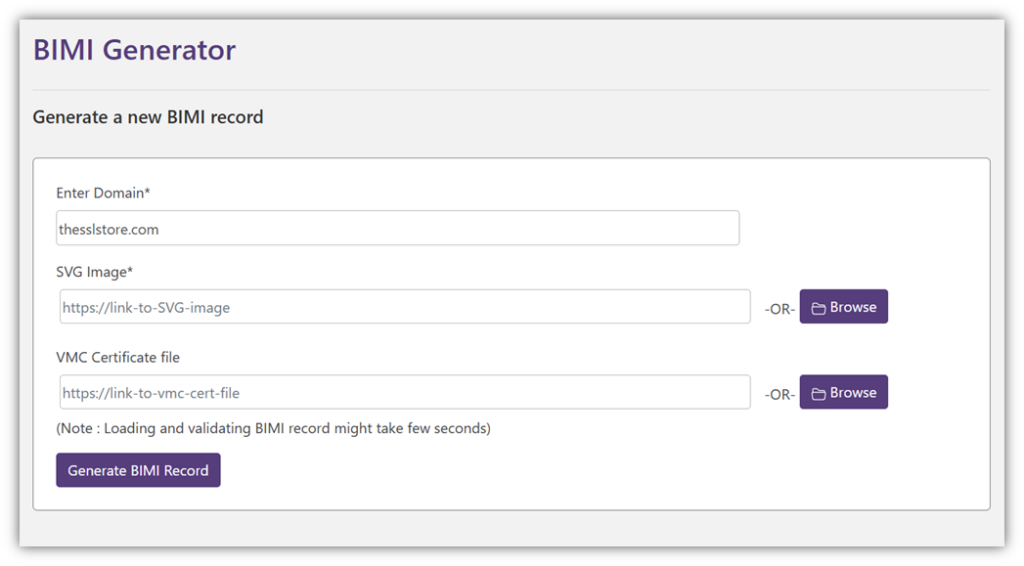
For the hostname, use default._bimi.your-domain-name, as this is recognized by many email clients unless otherwise set automatically by your domain provider.
Since there’s often a delay when adding a new BIMI record or updating an existing one, you can reduce the amount of time by adjusting the time to live (TTL) settings, which are counted in seconds. So, one minute = 60 seconds.
DigiCert recommends limiting the TTL for critical records from 30 seconds to no more than five minutes (300 seconds).
How to Create a BIMI Record — Step #2: Publish Your BIMI Record
Now, it’s time to add the TXT file to your domain. This process will involve logging into your DNS hosting provider’s (i.e., domain registrar’s) platform and navigating to where the BIMI settings are located.
NOTE: The specific location will vary based on your DNS provider, so be sure to check the company’s documentation or support pages for more information.
How to Create a BIMI Record — Step #3: Check & Test Your BIMI Record
Alright, now it’s time to make sure you set things up right. Check your BIMI record using a paid or free BIMI checker or inspector tool.
But don’t expect to see your logo displaying immediately. While it’s true that patience is a virtue, it doesn’t make the wait any easier. It’ll likely be a day or two before your BIMI logo will start displaying in the sender field of your outbound emails. (Google says it can take up to 48 hours.)
Once the wait is over, go ahead and send a test email to see if it’s working. If it’s not, reach out to our Support team and we’ll help you address any issues.