How Do I Make My Website Secure? The Essential Guide
Knowing how to make your website secure can be the difference between sharing positive news with website users and having to inform them that their data has been breached.
There are certain things every website owner should know, and a very important one is how to make your website secure (or, at least, as secure as possible). We’re here to provide guidance that may serve as a quick refresher for some and an educaitonal guide for others to explore.
Let’s hash it out.
How to Make Your Website Secure (17 Ways)
Let’s dive right into answering the question you want to know: “how do I make my website secure?”
Use Public Key Cryptography to Your Advantage
1. Install an SSL/TLS Certificate That Secures Your Main Domain (and Any Subdomains)
Considering we’re The SSL Store, it shouldn’t come as a surprise that the top item on our list would be a website security certificate. However, our reason for doing so isn’t purely biased; using a valid SSL/TLS certificate on your website:
- Is an industry best practice for securing data in transit using public key encryption.
- Improves your site’s Google search engine ranking.
- Aids compliance with industry data security and privacy laws and regulations.
- Supports your brand’s reputation and standing with customers through digital trust.
When data is transmitted in plaintext, it’s vulnerable to man-in-the-middle (MitM) attacks. This means that bad guys can see and steal sensitive data (credit cards, bank account info, usernames and passwords, etc.) they can use to commit crimes. They can also inject malicious content and create a host of other issues.
This next item on the list of how to make your website secure goes hand-in-hand with the first….
2. Carefully Manage Your PKI Digital Assets Using Automation to Avoid Downtime
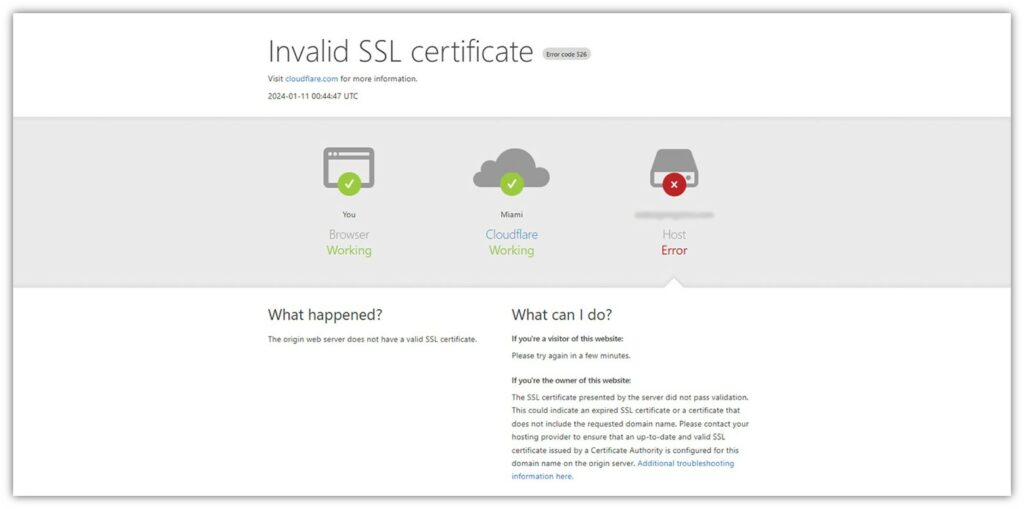
Having an expired, revoked, or otherwise invalid SSL/TLS certificate on your website or web app means you (and your company’s customer support team) are in for a bad day. When a certificate isn’t valid, your site, app, and customers will experience downtime or service outages.
For example, here’s the type of message your customers may see if your site is using an invalid SSL/TLS certificate:
This is what it may look like (in Google Chrome) if your site uses an expired website security certificate:
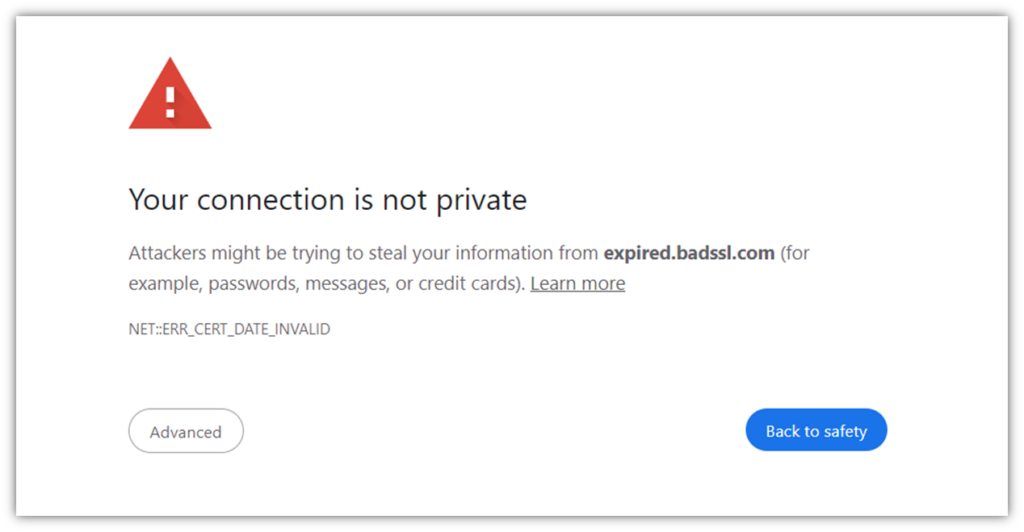
Downtime like this leaves customers with a bad impression of your company, damaging relationships and resulting in lost sales and revenue.
Check out our other related articles to learn more about expired certificates:
- This Is What Happens When Your SSL Certificate Expires
- Your Security Certificate Has Expired: Here’s How to Fix It (3 Steps)
Use Automation to Simplify Your Certificate Management Tasks
If you want to make these tasks easier on yourself, consider using a certificate management automation tool. These tools are designed to make certificate management easier by giving you complete visibility of your network and the cryptographic assets that are spread throughout it.
- Want to know what certificates you have and where they’re located? Done.
- How about when they were issued or will expire? No trouble at all.
- What about knowing who is responsible for managing them? Easy as pie.
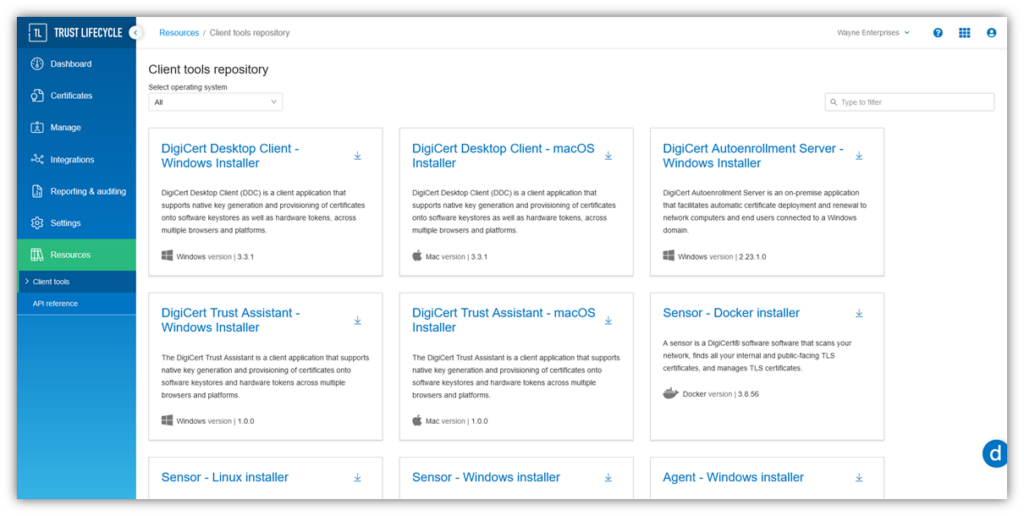
DigiCert Trust Lifecycle Manager Simplifies PKI & Digital Certificate Management
DigiCert Trust Lifecycle Manager is an all-in-one certificate lifecycle management (CLM) solution. Explore how this tool can help you keep a close eye on your PKI and avoid certificate outages.
3. Regularly Scan Your Website Using a Trusted Security Scanning Tool
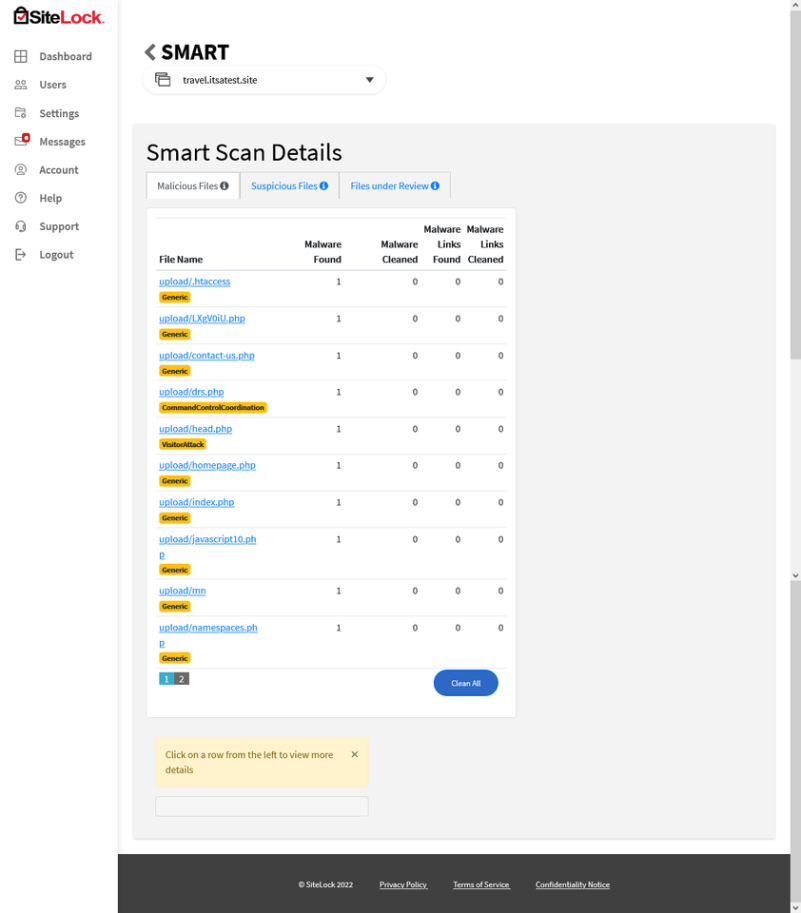
Ideally, you should use a daily website scanner to identify vulnerabilities and other exploit opportunities that must be addressed. Using a website scanning tool is something that can help you find and identify vulnerabilities and malware that may exist on your website.
SiteLock is a monitoring tool that enhances the security of your website by automatically scanning , detecting, and blocking cyber threats.
Don’t Like Malware or Other Vulnerabilities on Your Site?
We Don’t, Either.
Stay one step ahead of hackers by using SiteLock, a security solution that uses automation to scan and identify vulnerabilities to prevent future cyber attacks. Plans start as low as $9.37per month.
4. Use a Web Application Firewall (WAF)
A web application firewall is often considered an industry go-to for helping organizations protect their web apps against malicious actors and cyber attacks. Its job is to help you filter and monitor HTTP/HTTPS traffic to identify any unusual activity to or from your website/web apps.
A WAF can help you:
- Identify traffic surges and drops,
- Watch where traffic is coming from, and
- Help you stop bad bot traffic in its tracks.
This can be useful in helping you identify and mitigate distributed denial of service (DDoS) attacks.
But don’t think using a WAF alone is enough; using this tool should be part of a much larger cybersecurity strategy.
Not sure whether your site or web apps need a WAF? Ask yourself a few quick questions:
- Do you collect customer’s personal data through your web app?
- Does your organization engage in ecommerce activities?
- Do you want greater visibility of your traffic?
- Do you want to be able to help identify and stop DDoS attacks?
If the answer to any of these questions is “yes,” then you should be using a web application firewall.
5. Monitor Your Website Logs (Automated Tools Can Help)
Website and web app monitoring is vital for every website’s security. But we get it; monitoring logs for your digital properties is about as appealing as trimming your toenails. It’s a task you don’t really want to do, but, well, somebody’s got to do it.
Likewise, website logs provide a wealth of information relating to access requests, changes, errors, and security events and incidents. But the reality is that they generate an overwhelming amount of data that makes it virtually impossible to slog through manually. (Who has the time?)
As you can imagine, there’s an ungodly amount of “noise” generated by these tools. Thankfully, there are automated log analysis tools that can help you collect and make sense of all types of data.
Maintain Up-to-Date Website Security Tools and Plugins (Mainly For WordPress Site Admins)
Are you using WordPress for your site? If you’re like the 43% of websites estimated by W3Techs, then your answer is yes. If so, the following section’s talking points will mainly apply to you.
6. Ensure You’re Using Your Host Client’s Latest Software Version
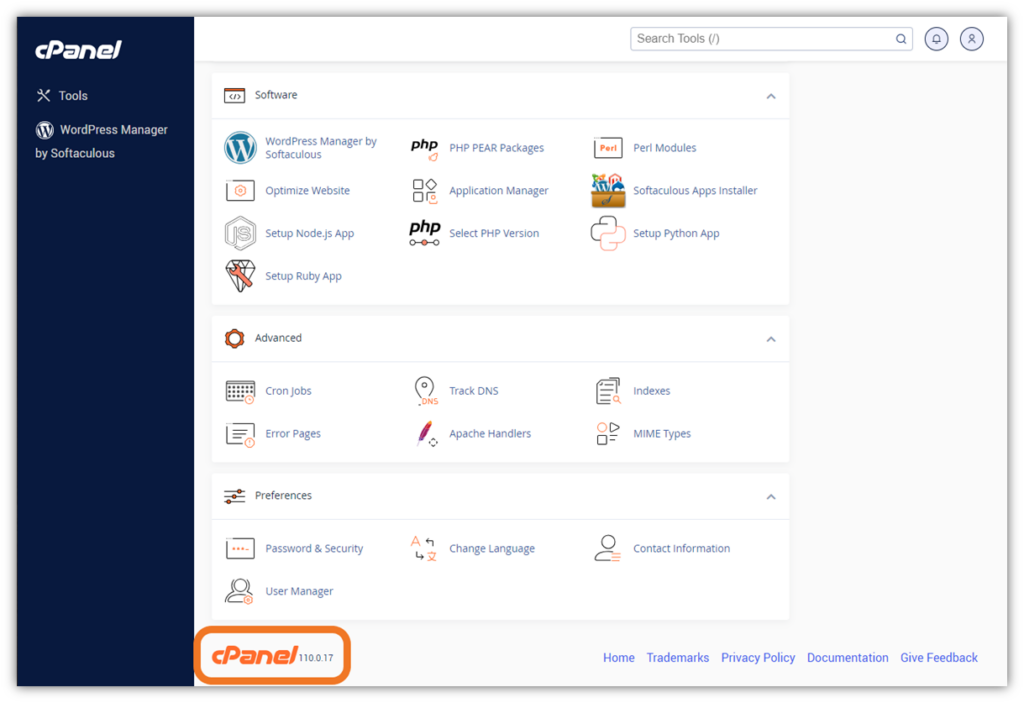
Regardless of which hosting management software you use (e.g., cPanel for shared hosting, Plesk, DirectAdmin), ensure that your server is running the latest version. If you’re not, then you’ll want to upgrade to the latest version of your interface.
Applying system patches and updates enables a software developer to fix any vulnerabilities or issues that would cause you problems now and/or down the road. So, as with any software, ensure you keep your software version as current as possible.
If you’re a cPanel user, for example, you can find out which version of the software you’re using by scrolling down to the bottom of your dashboard once logged in:
7. Install Plugins From Trusted (Reputable) Developers and Publishers
If you’re a WordPress site admin, you’re likely well acquainted with WordPress plugins, themes, and other add-ons. Plugins can meet and simplify a wide assortment of needs and tasks, providing flexibility and customization opportunities.
However, the drawback is that installing these tools can increase your attack surface if they’re not carefully managed and updated on the developer’s side. (More on that in a moment.) Using poorly guarded and outdated website plugins creates vulnerabilities within your website’s defenses that might not otherwise exist.
It’s for these reasons (and others) that, if you decide to use third-party plugins and themes, you should only choose ones from reputable developers/publishers who update their products regularly. Be sure to read the reviews and do your research via other sources as well before making a decision about which plugin(s) to use.
8. Keep All of Your Themes and Plugins Up to Date
WPScan reports that 94% of the vulnerabilities in their database are plugins. Cross-site scripting (XSS) attackers have been known to use vulnerable plugins to inject malicious code into WordPress sites. Depending on the severity, this type of attack can enable bad guys to take over your website completely.
For these reasons (and the ones we mentioned in the last two sections), you must keep your themes and plugins up to date. Doing so is both an industry best practice and a way to prevent threat actors from exploiting vulnerabilities on your website.
This is really simple to do in WordPress. In the left-hand navigation bar on your WordPress dashboard, click on Plugins and it’ll bring up a page listing all of your installed plugins (both active and deactivated). Here, you can manually update, activate, and deactivate your plugins, or enable auto-updates. NOTE: If a plugin has a vulnerability but no update yet, you won’t see it here. This is another reason why it’s crucial to do regular (daily) vulnerability scanning, too.
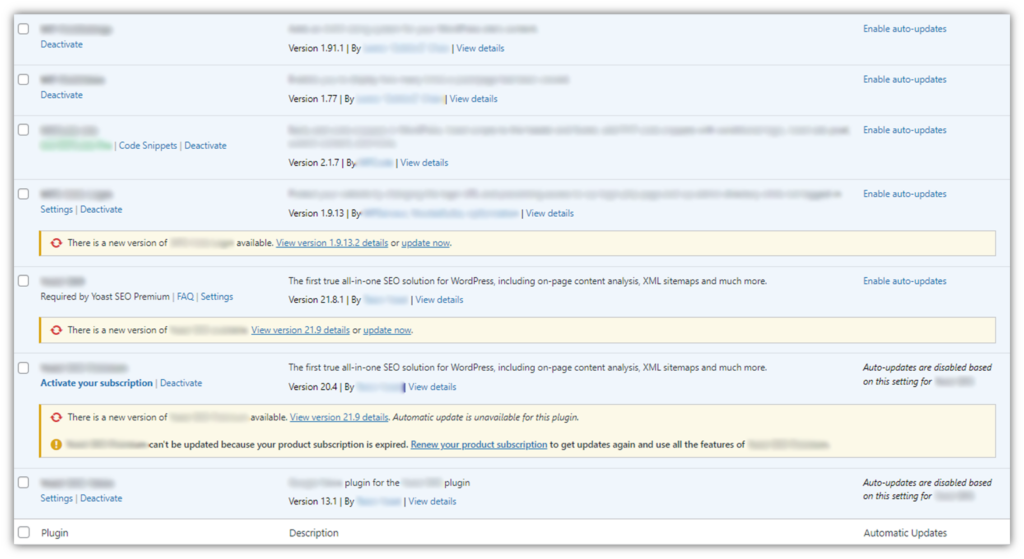
For Themes, just look under the Updates option in the left-hand navigation bar and scroll down. If any themes need updating, it’ll tell you there and will give you the option to update them in just two clicks.

Secure Access to Your Admin Dashboard and Other Sensitive Resources
9. Keep Tight Reins on Assigned Administrative Privileges and Access
Alright, we’re over halfway through the list of ways to answer the question: “how do I make my website secure?” Now, please repeat after me: Not everyone who wants access needs access.
Just because an employee wants admin access to your website, database, or other related resources should have it. Access should only be granted at the most minimal level. This is the idea behind the principle of least privilege (PoLP, or what’s also known as the least privilege model).
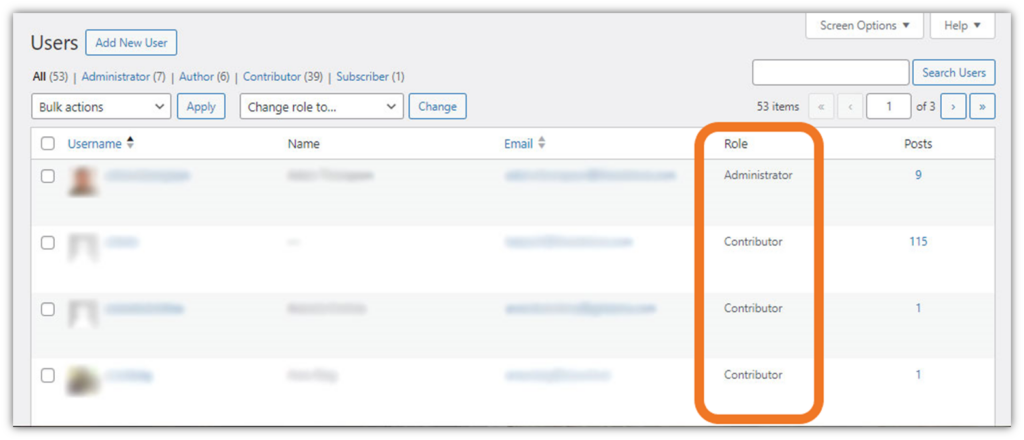
For example, access to your website’s Admin dashboard should be restricted to only those individuals who need it in their roles. Access privileges should be granted based on individual employees’ job responsibilities and the tasks they’re expected to complete. That’s it. Just give them the absolute minimum permissions they need to do their jobs.
This means that a marketing specialist whose job is to write and publish blog posts likely doesn’t need the same level of access as a web dev who needs to mess around with the website’s root directory. The same idea applies to access to your server and other sensitive resources. Take great care to ensure you only assign admin rights to those whose roles require them.
Here’s a quick example of what it looks like when a user is assigned access privileges by role in a WordPress blog:
10. Require Use of Secure, Unique Passwords (and a Password Manager)
While it may seem basic, practicing strong password security is one of the most essential points you can drive home to your employees. This is because your employees’ accounts (and everything they touch) are only as secure as the credentials they use to access them.
If their passwords are recycled from other accounts, or if they’re common passwords that can be found on virtually any breach list, then they’re useless as far as your site’s security is concerned.
We saw an ugly example of this when the genetic testing company 23andMe pointed fingers at customers after a data breach, saying they were reusing login credentials that were compromised in other third-party data breaches.
It’s vital to set password requirements and check inputs against known databases of leaked/breached passwords and common passwords. This way, if Sam on your Sales team tries to change his password to something that’s already identified as compromised, you can make it so that he’ll have to change his input to something else. (NOTE: Don’t tell the user that the password is already in use — that gives away too much information. Rather, inform the user that their password choice is invalid and make them re-enter a new password. We’ll speak more on that later.)
Furthermore, take the time to educate users on password security best practices for all accounts, including their website login credentials. This topic should include a conversation about securely storing passwords (i.e., saving them in a password management tool rather than storing them on Post-It notes).
11. Implement Zero-Trust Processes and Procedures
The idea behind zero trust is that you never trust anything or anyone automatically and must always verify everything. (It’s all about continuous authentication.) Virtually every company should aim for this approach in terms of securing their networks and overall IT infrastructure. But how does this apply to your website?
When it comes to securing administrative access to your website, lean on digital identity verification and authentication methods that go beyond traditional username-password combinations alone. So, what are some ways to help you verify someone’s digital identity when trying to log in as an admin on your site?
Implement Human-Verification Security Measures (MFA, CAPTCHA, etc.)
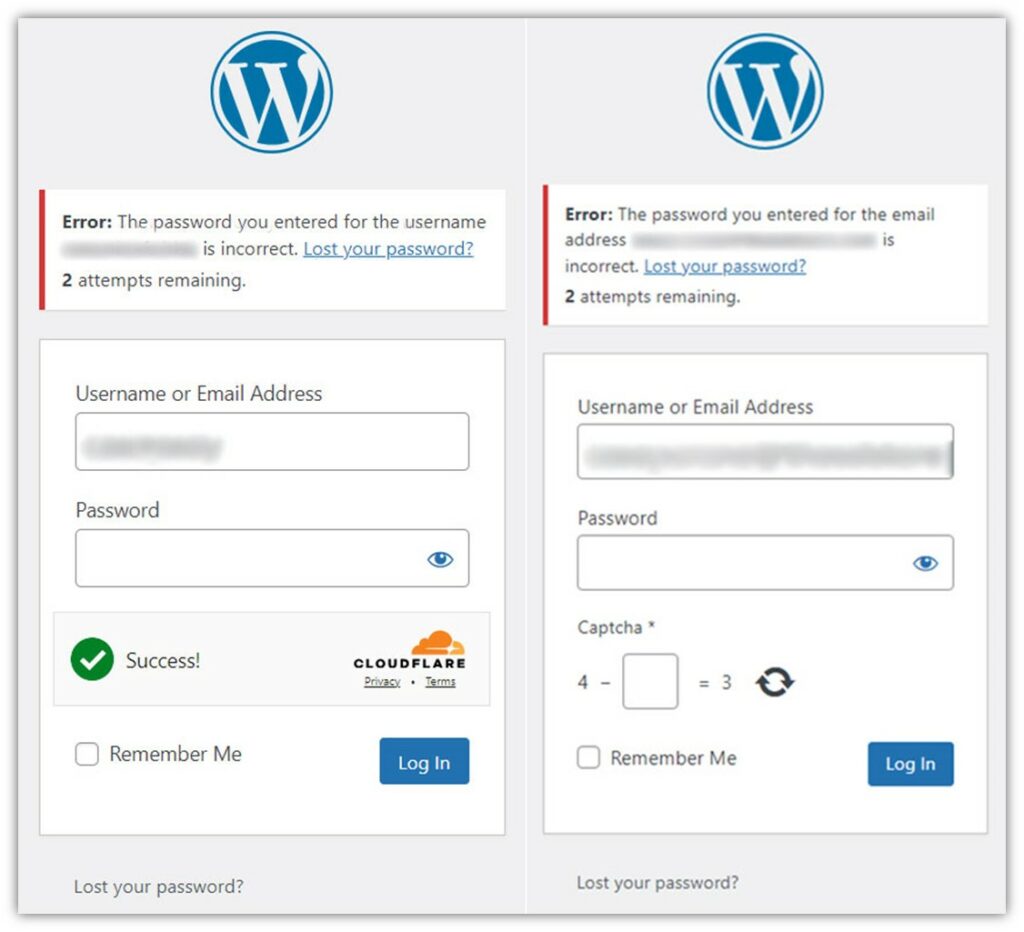
A good first step to cutting out bad bot traffic and brute force attackers is to implement multi-factor authentication (MFA), captcha/reCAPTCHA, or an equivalent replacement such as Cloudflare Turnstile.
Let’s quickly review what each of these tools do:
- Multi-factor authentication — These tools add another layer of security to the authentication process by requiring users to prove their identities via more intricate methods. For example, you have to know a password and have a phone that receives a push notification from an authentication app such as Google Authenticator or Okta.
- CAPTCHA or reCAPTCHA — These automated security mechanisms require you to do something to prove you’re a real human and not a bot in order to authenticate. For example, you may have to pick out pictures, click a bot, answer a math question, sole a puzzle, or engage in some other way.
- Cloudflare Turnstile — This alternative to CAPTCHA technologies runs JavaScript challenges that detect human behaviors and involve secret keys and tokens in the background. This mechanism doesn’t require users to solve any puzzles or engage in similar ways.
Here’s what it looks like when you have a Cloudflare Turnstile or math CAPTCHA enabled on WordPress and someone tries to log in with the wrong password:
Require Admin to Use Secure Connections
A little CYA is always helpful for businesses — particularly in our increasingly litigious world. As an organization, one of the things you can do is establish internal company policies covering set behaviors and standards that every employee is expected to abide by.
For example, when employees sign into their work device, you can have an acknowledgment screen that communicates set behaviors and standards that they must acknowledge to access the device.
In your documented procedures, be sure to specify that when accessing secure digital assets and systems (including your website’s admin dash), authorized users must always use secure, encrypted connections. Here are two such ways to accomplish this:
- Require in-office employees to connect via your company’s secure ethernet network, or
- Require users working remotely to use a secure VPN connection based on PKI client authentication certificates.
You also can make this one of your policies that employees must read, acknowledge, and agree to adhere to as part of the hiring and employment process.
12. Limit Invalid Login Attempts
This is a biggie regarding knowing how to secure a website. If you don’t want people trying to brute force their way in, a good security measure to prevent them from doing so is to set account lockout thresholds. For example, you can set it so that any user can attempt to enter their password no more than three times. After that, the account will be locked for a specified period (10 minutes, 3 hours, 24 hours, etc.).
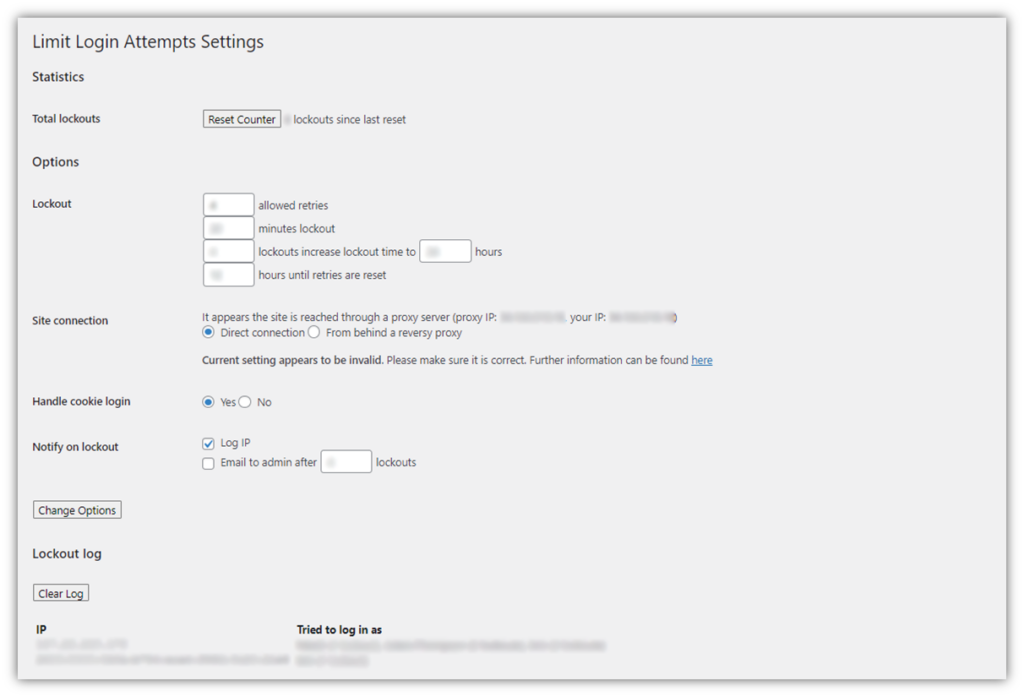
This approach helps prevent attackers from unleashing scripts with guessed username-password combinations from brute forcing their way into your site. This is also beneficial for credential stuffing and other similar attacks for the same reason.
13. Use Allowlists and Blocklists to Restrict Access to Your Admin Controls
Allowlists (formerly called whitelists) and blocklists (formerly blacklists) are tools that give website admins granular control of access to their digital properties. They can be used in multiple scenarios, including whitelists of websites and email accounts.
For websites, allowlists typically rely on user’s IP addresses. For example, you can use an allowlist to restrict access to specific parts of your website, such as the login page, to only one or more specified users by including their IP address on an allowlist.
Likewise, you can use a blocklist to preclude specific users from accessing parts of your website.
Imagine a scenario where you’ve bought a beautiful house in a restricted, gated community.
- If you want only certain people to have access to the house, you can provide the community’s security team with a list of authorized users (allowlist) to permit entry.
- If there’s someone you wouldn’t want to access your new digs, you can provide that person’s info to the guards at the gate. That individual would be barred from accessing the property (blocklist).
When you use an allowlist, you can set default access settings to deny, thereby precluding anyone whose IP address isn’t explicitly noted. But how can you use this to permit connections from only specified IP addresses?
- Install plugins that enable allowlist/blocklist capabilities (for WordPress users).
- Update your site’s .htaccess file to list specific IP addresses. (NOTE: This should only be done by experienced site admins.)
- Set firewall rules to enforce your allowlist.
14. Use Salting to Increase the Security of Stored Password Hash Values
If your website allows users to log in by creating usernames and passwords, this section is for you. Password salting is an important practice in database security for securing stored password-related details. You never want to store plaintext passwords in your database because they’ll be vulnerable to compromise via hash table and rainbow table attacks. Instead, what you should store is the salted password hash values.
This process involves taking an input (i.e., a plaintext password) and adding a salt (a random, unique string of data) to it before applying a cryptographic hash function. This generates a unique password hash value that you can use instead of a plaintext password.
Let’s imagine this using the password Password123 and the salt value +Oa8kFpYobjX:
Password123 + +Oa8kFpYobjX = e72fd887c202a4367b8a96d42d1a1e10
Even if two users use the same password, when a unique salt value is added to it before applying the hash function, the resulting hash value for each user’s password will be completely different.
Don’t Give Away Too Much Information
Securing your account-related information is akin to playing poker: you need to keep your cards close to the vest and not have any tells that alert other players to your plans. Likewise, when it comes to account security, you don’t want to give away too much information in error response messages.
When a user tries to log in to a website using the wrong password, for example, it’s not uncommon to see a message kick back, stating that they’ve entered the wrong password. While on the surface this seems like a standard response, this approach can decrease your website’s security because it provides cybercriminals with useful information they can use for credential stuffing attacks.
For example, if you specify that the password specifically was incorrect, then it lets them know that the username is correct. They can then use that username and try different password combinations with it until they hit gold.
Implement Database Hardening Techniques
15. Secure Access (Physical and Remote) to Your Database
Your website and database are separate but intricately related digital assets that must be secured. Websites use databases as backend storage and management systems for all sorts of content (think website copy, graphics, video media, etc.). They rely on databases to store data that they can retrieve and display to users without having everything hardcoded directly on the site.
Strong database security enables authorized access to data while still maintaining the confidentiality, integrity, and availability (CIA) of the database itself.
There are physical security measures you can use — keeping your database server(s) locked up, implementing secure access using ID cards, installing cameras, etc. But what if your database isn’t on prem? Then, at the very least, use separate databases for internal and external uses. Require authorized users to connect to your database using client authentication-based secure connections via a VPN. And remember: only give access permissions to people whose roles require it!
16. Secure Your Web Apps and Forms Against Common Database Attacks
Remember how we mentioned that bad guys are always looking for the easiest point of entry? One such method is searching for SQL injection flaws in your site’s web apps that they can exploit. Some ways to make your database more secure against SQL attack techniques include:
- Using parameterized database queries
- Sanitizing web app inputs
- Keeping your backend components (libraries, frameworks, database software, etc.) current
Check out our other resource to learn more about how to secure your web apps and database(s) against SQL injections.
17. Use Custom Ports to Help Reduce Log Clutter and Limit Automated Attacks
It’s no secret that cybercriminals love to target “low-hanging fruit” — i.e., websites and databases with outdated, crappy or non-existent cybersecurity mechanisms in place. Why? Because they’re easy pickings. It’s the equivalent of a shark targeting an injured seal rather than a healthy, able-bodied seal that can fight back.
Using default port numbers represents one of these easy-picking opportunities for bad guys. Ports allow information to flow between a website and the browser connecting to it. For example, a port commonly used for secure shell (SSH) protocol is port 22. For example, IONOS recommends changing it to a port between the “1024 and 65536” range. According to the IANA Allocation Guidelines for TCP and UDP Port Numbers, “The Well Known Ports Are Assigned by IANA and over the range 0-1023,” so it’s best to avoid using them for deployments or product releases.
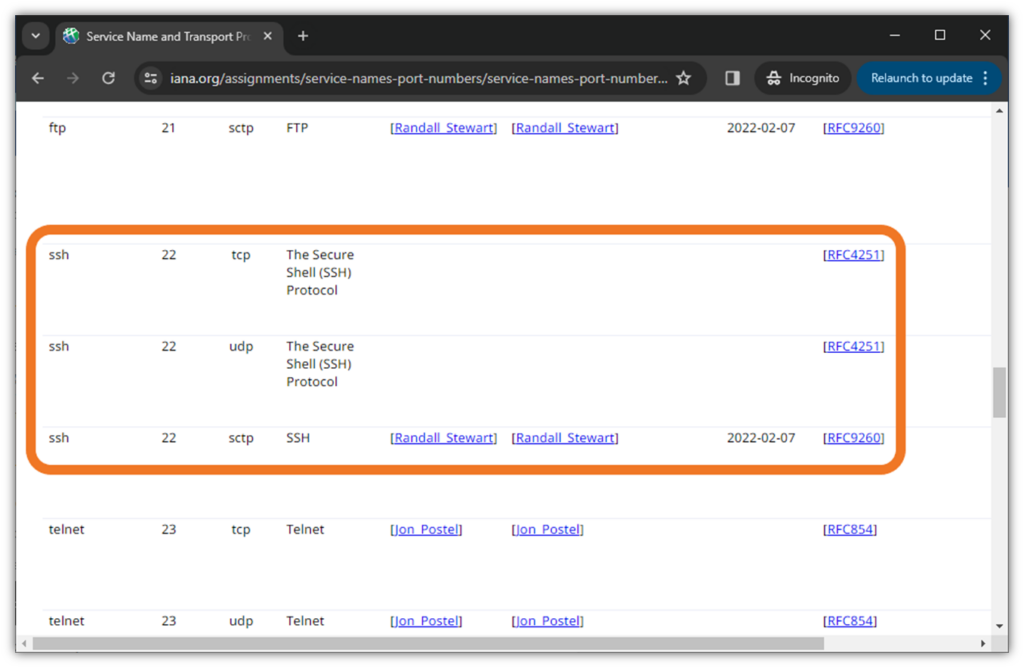
Simply put, changing from default to custom port numbers is a way to create a layer of security through obscurity.
It’s important to note, however, that port scanning isn’t technically a threat on its own; it’s a method of reconnaissance that provides attackers with information they can use against you. While changing port numbers doesn’t stop bad guys who are determined to figure out what ports you’re using, it eliminates the guys, gals, and bots who mass-scan default ports. So, why not close that window and not give attackers a potential “in” to your site or web services?
To figure out what port numbers to use, check out the Internet Assigned Numbers Authority’s (IANA’s) Service Name and Transport Protocol Port Number Registry to see which numbers aren’t used for other services.
Final Takeaways on How to Make Your Website Secure
It used to be that prospective customers could look up your ads and listings in the Yellow Pages or follow the recommendations of family members and friends. While word-of-mouth still plays a critical role, your website often provides your company’s first impression to customers.
This is why having a website that’s informative, useful, performs well, and is secure matters. No one (myself included) likes receiving notices that the companies whose websites or services they’ve been using have been compromised. If you take steps now to make your website, web apps, and other digital assets as secure as possible now, you can avoid the pitfalls and security issues that lead to breaches down the road.
We hope you’ve found this article informative and useful. Have other insights and recommendations for how to secure a website? Share them in the comments below.


![A Look at 30 Key Cyber Crime Statistics [2023 Data Update]](https://www.thesslstore.com/blog/wp-content/uploads/2022/02/cyber-crime-statistics-feature2-75x94.jpg)


Be the first to comment